How Can We Help?
Create your Custom Website
Overview
The RunHOA Website Builder is an intuitive, user-friendly tool designed to empower Homeowners Associations (HOAs) to create and manage their own websites with ease.
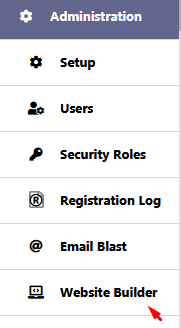
The Website Builder is accessible through the ‘Administration’ panel, under the ‘Website Builder’ option.
A clean, organized layout ensures that even users with no technical background can navigate and use the builder effectively.
Website Setup and Management
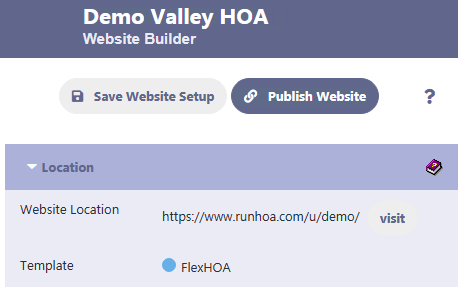
- Save Website Setup: Allows you to save the progress of your website configuration at any stage.
- Publish Website: With a single click, you can make your website live for your community to access.
Location
- Website Location: This is the URL where your HOA website will be accessible. For example, “https://www.runhoa.com/u/demo” is a ready-to-use link provided by RunHOA where your website will be hosted.
- Visit: By clicking ‘visit’, you can preview your website in its current state.
- FlexHOA: This is the design template currently available for your website. It’s a flexible and user-friendly design, making it simple to navigate and pleasant to view.
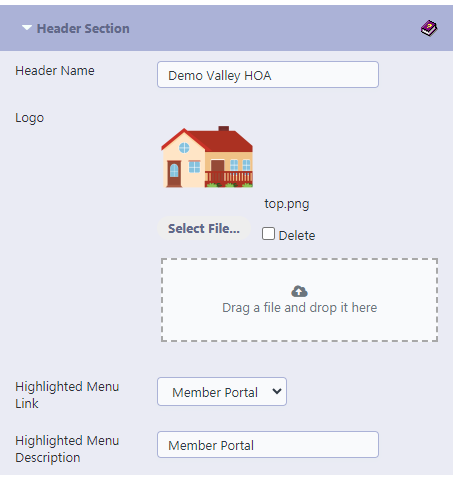
Header Section
The Header Section is the first thing visitors will see upon arriving at the website, making it crucial for establishing the HOA’s identity and welcoming residents and visitors. It is customizable to fit the HOA’s branding and messaging needs.
- Header Name: This is where you enter the name of your Homeowners Association, such as “Demo Valley HOA.” This name will be displayed prominently at the top of your website.
- Logo: You can upload your HOA’s logo here by clicking ‘Select File.’ The logo helps to establish your brand and gives your website a professional appearance. If you need to remove an already uploaded logo, you can click the ‘Delete’ checkbox. The image area displays the currently uploaded logo, “top.png” in this case, which can be a JPEG, PNG, or GIF file format. Ensure your logo is clear and of high resolution to maintain a professional image. (Note: Image Size should be less than 2MB , Anything above will not load)
- Highlighted Menu Link: This dropdown menu allows you to select which page or section of your website you want to emphasize or direct your visitors to, such as the ‘Member Portal’.
- Highlighted Menu Description: This is where you provide a brief description or the name of the highlighted menu link. The text entered here, “Member Portal” for instance, will be what is displayed on your website to describe the highlighted link, guiding your visitors to a specific area of the site such as member resources or important updates.
Be sure to save your setup regularly to avoid losing changes

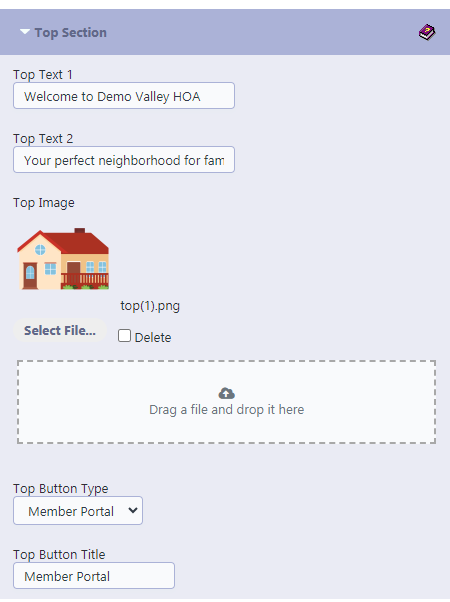
Top Section
The Top Section of the RunHOA Website Builder is where you can set the introductory elements that visitors first encounter.
- Top Text 1: Enter a welcoming phrase or the name of your HOA here. For instance, “Welcome to Demo Valley HOA” sets a friendly tone right away.
- Top Text 2: Use this space for a slogan or a brief descriptor that encapsulates the spirit of your community.
- Top Image: Upload a image or a representative picture of your HOA by clicking ‘Select File.’ A good image could be of the community landscape, a common area, or the HOA building. If you’ve previously uploaded an image and wish to remove it, you can use the ‘Delete’ checkbox. The displayed image, “top(1).png”, will be what visitors see first, so make sure it’s high-quality and sets the right impression. (Note: Image Size should be less than 2MB , Anything above will not load)
- Top Button Type: This dropdown menu allows you to select a specific action or destination for a button on your website. In this case, “Member Portal” is selected, which will lead users to a login area for the Member Portal.
- Top Button Title: Here, you provide the text that will appear on the button itself. The title “Member Portal” informs users of where the button will take them, promoting easy navigation.
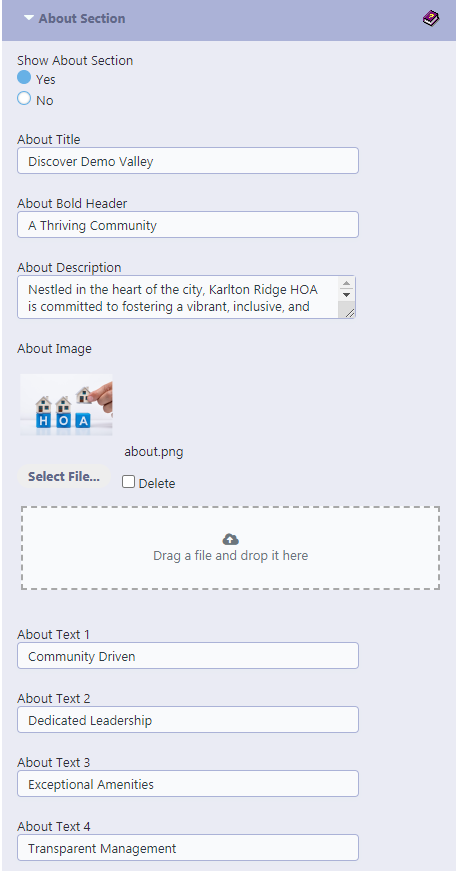
About Section
This section is designed to introduce the Homeowners Association to visitors, offering a space to share the community’s values, history, or any important narratives that define the HOA.
- Show About Section: This switch allows the website administrator to either display (Yes) or hide (No) the About Section on the website. It provides flexibility in the presentation of the website’s content.
- About Title: Input a welcoming title, for instance, “Discover Demo Valley”, to draw visitors into learning more about the community.
- About Description: Provide a detailed description that captures the essence of your HOA, such as “Nestled in the heart of the city, Karlton Ridge HOA is committed to fostering a vibrant, inclusive, and…”
- About Image: The section allows for the inclusion of an image to visually represent the community or the topic of the section. The file “about.png” is currently selected, with options to change (Select File) or remove it (Delete). (Note: Image Size should be less than 2MB , Anything above will not load)
- About Text Fields (1-4):
- These should be filled out with statements that are relevant to the user’s experiences and the HOA’s achievements. Examples could include:
- “Community-Driven Initiatives” – Mention specific programs or events led by the community.
- “Leadership Excellence” – Detail the qualifications and successes of the HOA’s board members.
- “Amenities Galore” – List out the key amenities that make your HOA stand out.
- “Transparent Governance” – Discuss the processes in place that ensure clear communication and decision-making.
Remember, each text field should contain information tailored to the user’s knowledge of the HOA and what they find most valuable about the community. After filling out these details, ensure that you save the changes to maintain an updated and engaging HOA website.
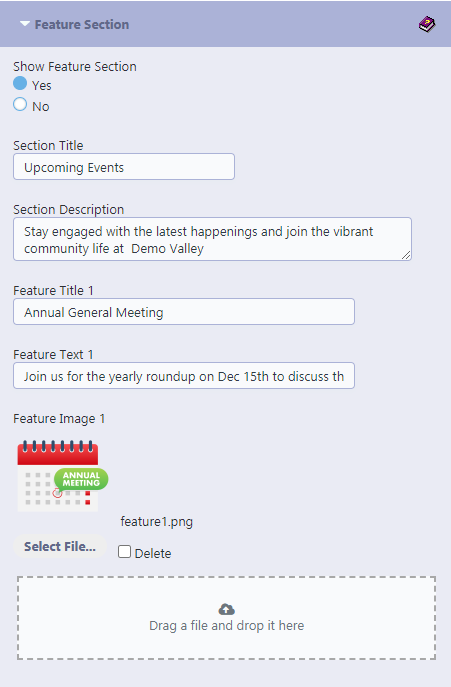
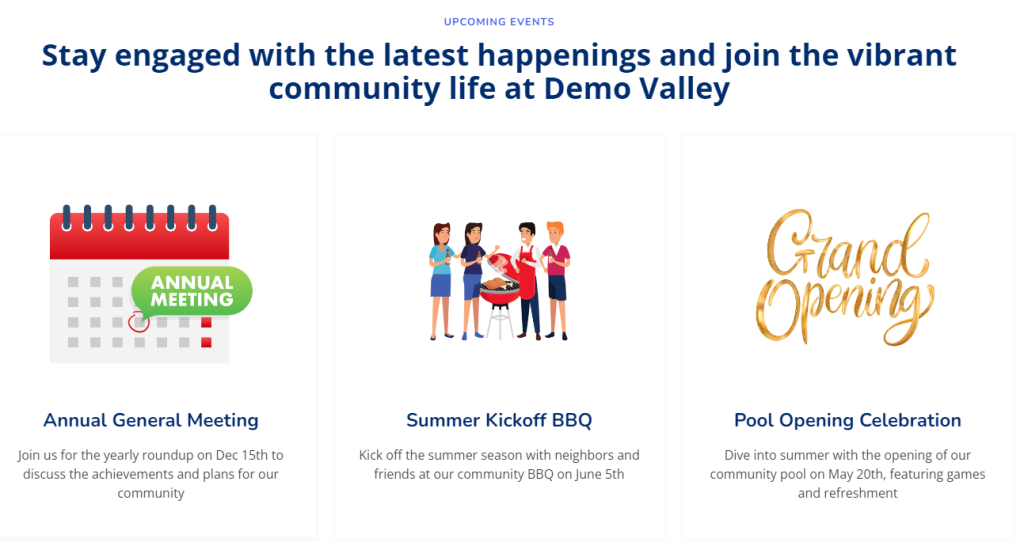
Feature Section
For the “Feature Section” of your HOA website in RunHOA, you can provide engaging content to highlight upcoming events, special announcements, or any key features of your community. Here’s a breakdown of the content fields for the help section:
- Show Feature Section: Toggle to decide if this section will be displayed on the website.
- Section Title: Enter a headline for the feature section, such as “Upcoming Events”.
- Section Description: Provide a brief description or introductory text that sets the context for the features you are about to list.
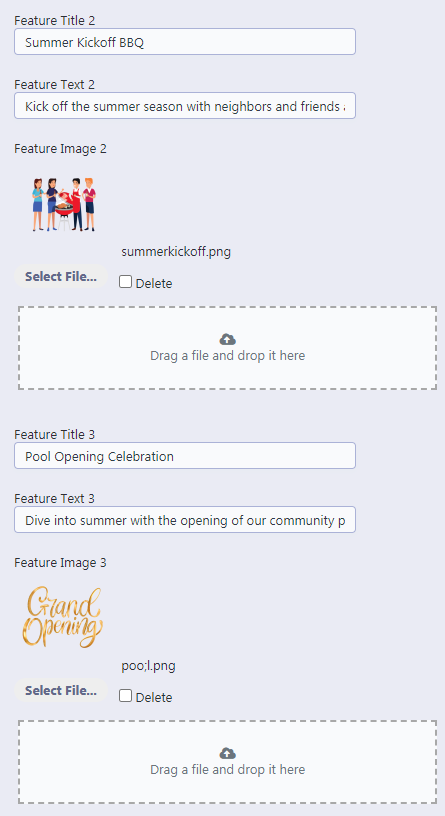
- Feature Title 1, 2, 3…: These are the headlines for each individual feature you want to showcase.
- Feature Text 1, 2, 3…: This field is for the description of each feature. It should be a concise text explaining the feature or detailing the event.
- Feature Image 1, 2, 3…: Upload an image that represents or relates to the feature. It could be a banner for an event, a photo of a community space, etc.
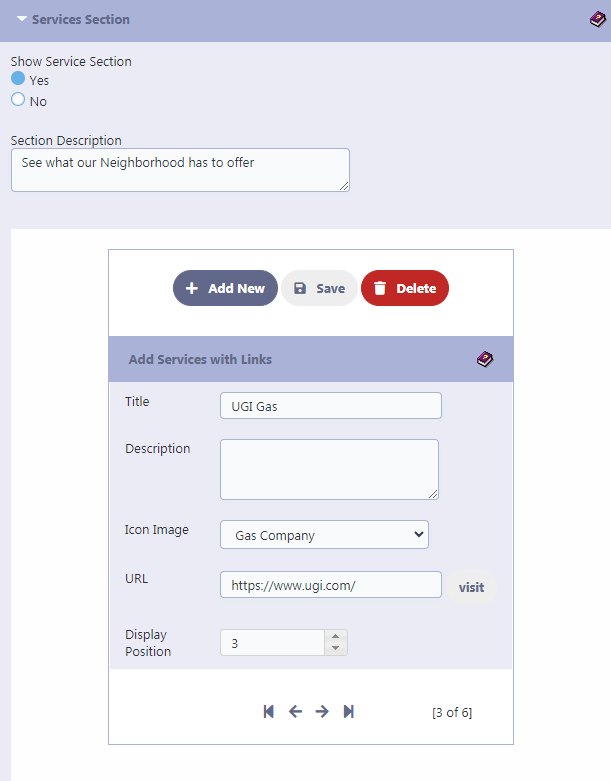
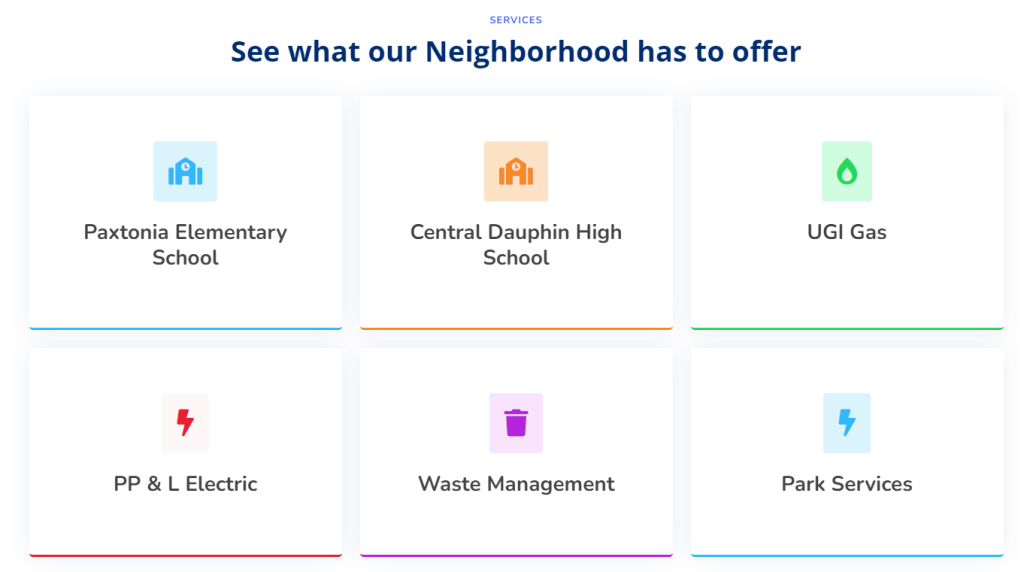
Services Section
The Services Section in the RunHOA website builder is designed to let homeowners’ associations (HOAs) easily showcase various services available to their community members directly on their website. This feature allows for the listing of essential and beneficial services such as local schools, utility companies, waste management, park services, and more. By adding service providers along with descriptions, icons, and links, HOA members can quickly find useful resources and contact information.
- Show Service Section: Toggle this to ‘Yes’ to include a service section on your HOA website, showcasing available services around your community.
- Section Description: Here, enter a brief introduction or overview of the services your neighborhood offers. This text will be displayed as a header for the service section.
- Adding Services with Links: To add a service, click on the ‘Add New’ button. Each service will require the following information:
- Title: The name of the service, such as “Paxtonia Elementary School” or “UGI Gas”.
- Description: A short description of the service. It could be a tagline or a brief statement about the service.
- Icon Image: Choose an icon that best represents the service. This will be displayed next to the service title on the website.
- URL: Provide the link to the service’s website or a relevant contact page. This will be the destination users are directed to when they click on the service.
- Display Position: If you have multiple services, you can order them by specifying their display position. The service with position ‘1’ will appear first, followed by ‘2’, and so on.
- Editing and Deleting Services: To edit an existing service, change the fields as necessary and click ‘Save’. If you need to remove a service, click the ‘Delete’ button next to the corresponding service entry.
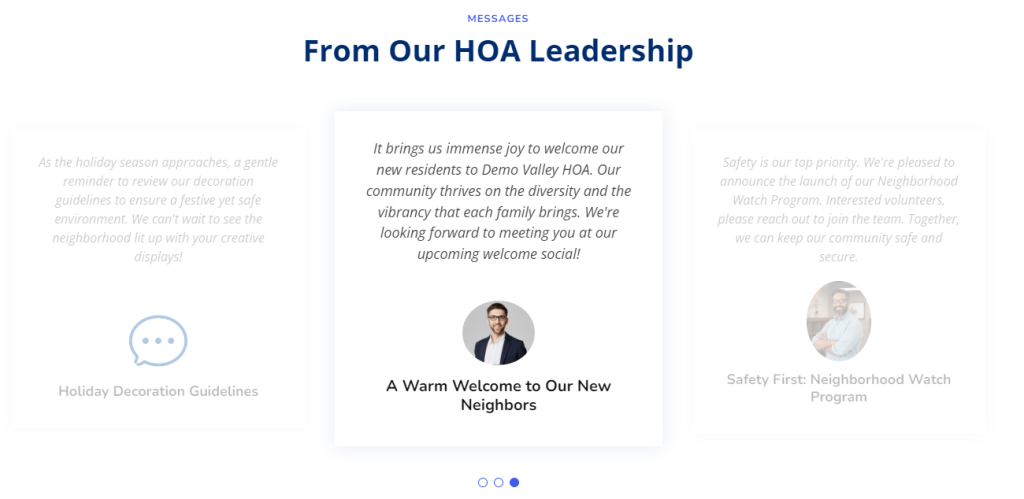
Message Section
The Messages section of your HOA website is a dedicated space for the leadership team to communicate important information, updates, and friendly reminders to the community members. Here, you can highlight key messages that embody the spirit and ongoing activities of your association.
- Show Messages: Choose “Yes” to display the messages section on your website. Select “No” to hide it.
- Section Description: Provide a brief introduction or headline for the message section, such as “From Our HOA Leadership.”
- Message Title 1, 2, 3, …: These are the headlines for each individual message. Use titles that grab attention and give a hint about the content of the message.
- Message Image 1, 2, 3, …: Upload a representative image that relates to each message. This could be a photo of the message’s author or an image that complements the message topic.
- Message 1, 2, 3, …: The main text area where you detail the message from the HOA leadership. This could be a welcoming note to new residents, safety guidelines, event announcements, or any other communication deemed significant by the HOA.

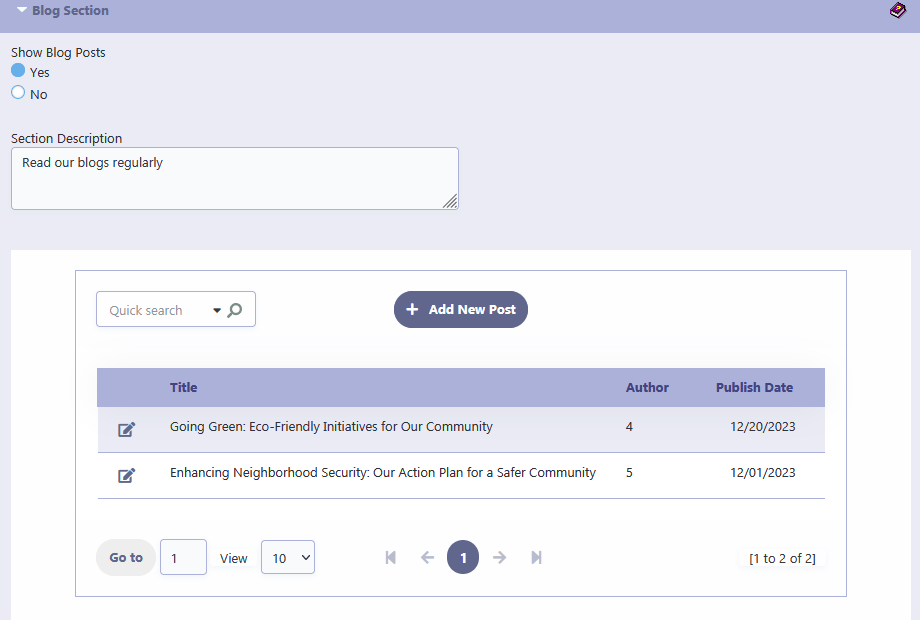
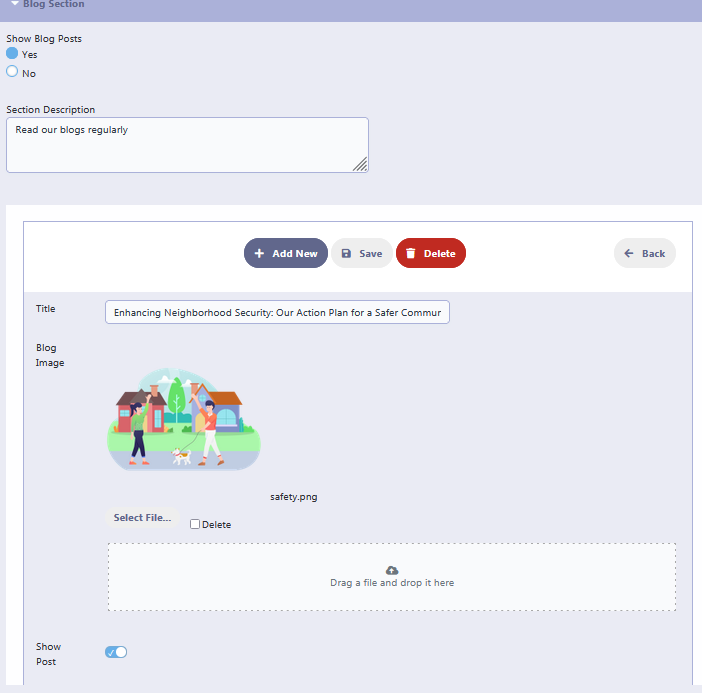
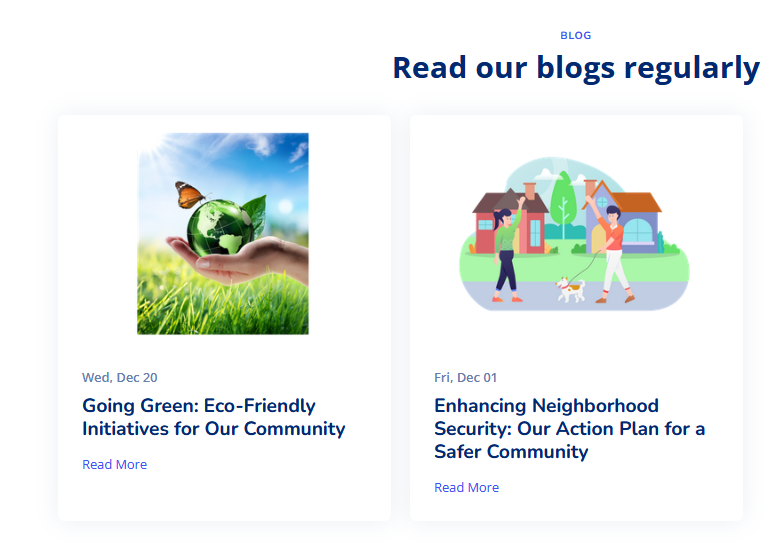
Blog Section
- Show Blog Posts: This toggle option allows users to decide if the blog section should be displayed on their HOA website. It’s useful for sharing updates, news, events, or informative articles with residents.
- Section Description: This is a brief text that describes what the blog section is about, such as “Community News” or “Updates from the HOA Board.” It provides context to the website visitors about what type of content they can expect to find in the blog posts.
Individual Blog Post Fields
- Title: The title of the blog post. It should be catchy and summarize the content of the post to entice readers to click and read more.
- Blog Image: A visual representation of the blog post’s content. It could be a relevant photograph or a graphic that supports the post. This field allows you to upload the image file from your computer. (Note: Image Size should be less than 2MB , Anything above will not load)
- Show Post: A switch to specify whether this particular blog post should be visible to website visitors.
- Author: A drop-down menu where you can select the name of the author to be displayed. You can also choose ‘Do Not Show’ if you prefer not to display authorship.
- Published Date: The date when the blog post was published. It can be entered manually or selected from a calendar interface.
- Content: The main text area for the blog post content. Here, users can write the article, format text, insert images, links, and other media to create engaging content.
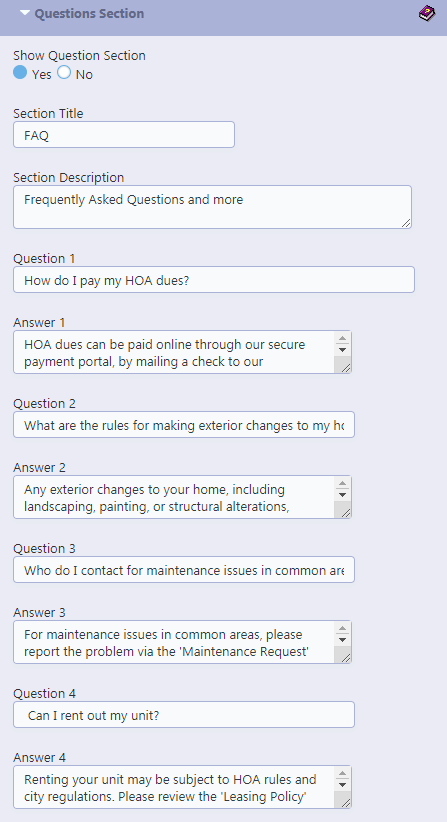
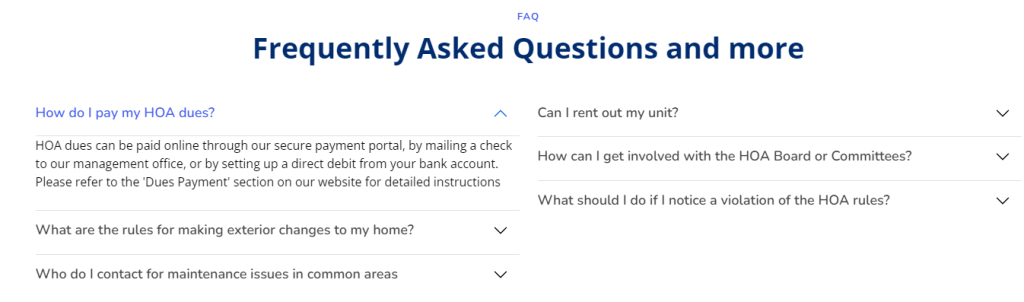
Questions Section
This section acts as a Frequently Asked Questions (FAQ) resource, providing quick and straightforward answers to the HOA members’ most frequent inquiries. It is an essential tool for reducing the volume of routine questions directed to the HOA staff by providing accessible information. The Questions Section is an invaluable part of the HOA’s digital presence, allowing for efficient communication and fostering a sense of support and accessibility within the community. It’s a self-service resource that empowers residents with instant information while streamlining the HOA’s operations.
- Show Question Section: This toggle allows the HOA to choose whether the Questions Section is visible (Yes) or hidden (No) on the website. This flexibility is useful for updating the FAQ or adding new questions without disrupting the user experience.
- Section Title: The heading of the FAQ section, which in this case is set to “Frequently asked questions.” This title can be customized to align with the HOA’s specific terminology or branding preferences.
- Section Description: This field is intended for a brief introduction or overview of the section. It can explain the purpose of the FAQ or how to use it.
- Question 1 to Question 6: These fields are for the actual questions that the HOA members frequently ask. They are designed to be concise and to the point, for example, “How do I pay my HOA Dues?” or “What are our HOA Fees?”
- Answer 1 to Answer 6: Corresponding to each question, these text boxes contain the answers. The answers should be clear, concise, and provide enough information to address the question effectively.
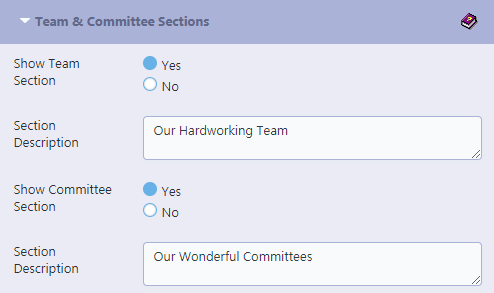
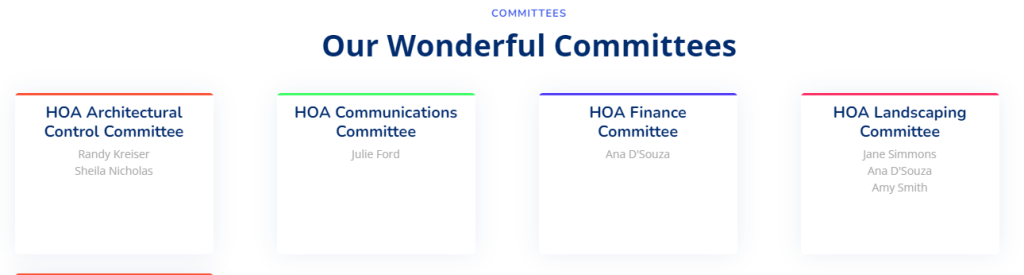
Team & Committee Section
The purpose of the Team Section is to introduce the HOA board members or officers to the community. This section adds a personal touch to the HOA’s website, allowing residents to become familiar with the individuals overseeing the community’s affairs. The information displayed in this section is automatically retrieved from RunHOA’s Board/Officers module, ensuring that the team’s details are up-to-date and accurately represented. The same goes for the Committee section.
Team Section
- Show Team Section: This toggle option allows you to choose whether or not the team section is displayed on your website.
- Section Description: This field is where you input a brief introduction or description of your team. It sets the context for the website visitors about the team members they will see listed below.
Committee Section
- Show Committee Section: Similar to the team section, this toggle lets you decide if you want the committee section to be visible on your website.
- Section Description: Here, you describe the committees that operate within your HOA. This could include a general statement about the roles and contributions of these committees to the community.

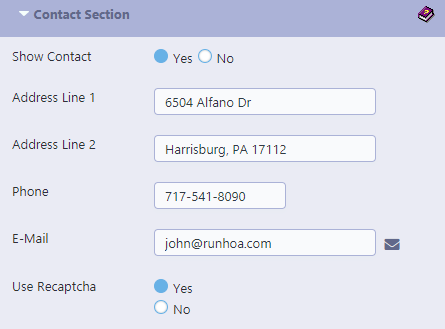
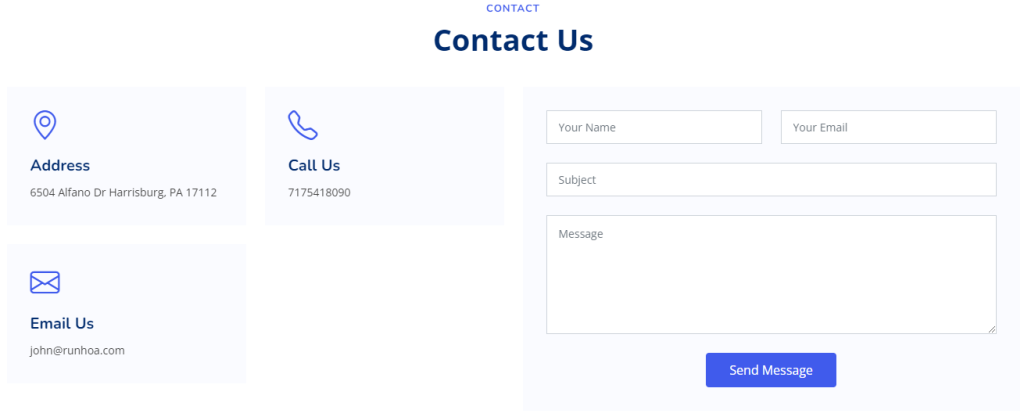
Contact Section
This section is designed to provide all necessary contact information for the HOA, making it easy for members or prospective members to reach out for assistance or information. The inclusion of this section on the website is essential for transparency and accessibility.
- Show Contact : This toggle feature allows the website administrator to make the Contact Section visible (Yes) or hidden (No) on the website. This option is useful for times when the HOA might need to update contact information or temporarily remove it from public view.
- Address Line 1 and Line 2: These fields are used to provide the physical mailing address of the HOA. In the example, “6504 Alfano Dr” is specified, with “Harrisburg” indicating the city or locality. This information is crucial for anyone needing to send physical mail or visit the HOA office.
- Phone: The phone number field, “717-541-5007” in this case, is where the HOA lists a contact number for phone inquiries. It’s a direct line for members to speak with a representative for immediate assistance or support.
- E-Mail: The provided email address, “ken@runhoa.com,” offers an alternative method of communication, allowing for inquiries that may not require an immediate response or for documentation purposes.
- Use reCAPTCHA: Options: Yes / No
- Details on Using reCAPTCHA: Activating the reCAPTCHA feature adds a layer of protection against spam to your contact forms by leveraging Google’s advanced security service.
- Understanding reCAPTCHA: reCAPTCHA is a free service from Google that safeguards your site from spam and bot abuse. It differentiates between actual users and automated users with sophisticated algorithms.
- Advantages of reCAPTCHA:
- Security Boost: Protects against spam and automated bot interactions. User Convenience: Simplifies the verification process for legitimate users with minimal interaction. Reliability: As a Google service, reCAPTCHA is a secure and widely-accepted standard for website protection.
- Opting Out of reCAPTCHA: Disabling the reCAPTCHA feature means that your contact forms will not include this additional verification step.
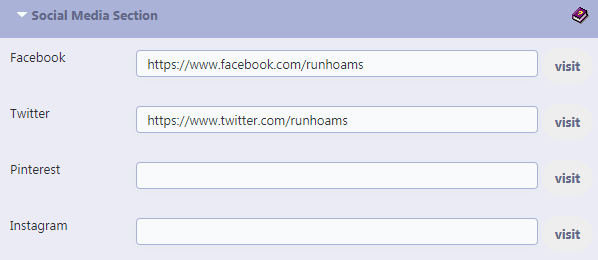
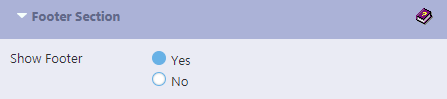
Social Media and Footer Section
This section typically appears at the bottom of every page on the website and includes important links and information that is consistently accessible from anywhere on the site. It is a standard practice to include social media links, contact information, and other essential details in the footer.
- Facebook: This field is for the HOA’s Facebook page URL, providing a link that members can follow to connect with the HOA on Facebook. The example shows “https://www.facebook.com/runhoams” as the input link, and a ‘visit’ button allows users to go directly to the Facebook page.
- Twitter: Similar to the Facebook field, this one is for the HOA’s Twitter handle. The provided URL “https://www.twitter.com/runhoams” directs members to the HOA’s Twitter profile, offering another platform for members to stay updated on HOA news and events.
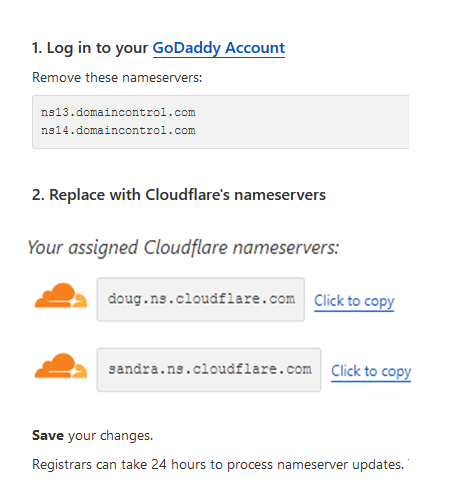
Is it possible to use an existing domain name with RunHOAs website?
Yes, absolutely! If you already have a domain name registered with providers like GoDaddy, or Namecheap, or Google Domains, or WordPress you can still use it with your RunHOA website.
To do so, you will need to point your domain name to the following nameservers:
Nameserver 1: lauryn.ns.cloudflare.com
Nameserver 2: lochlan.ns.cloudflare.com
Once this is done, simply provide us with your domain name and we’ll take care of the rest, redirecting your domain to your website hosted on the RunHOA servers.
If you prefer, you can provide us with the desired domain name, and we will handle the process of purchasing, setting up, and maintaining it for an additional $30 per year.
Check out demohoa.net
e.g for GoDaddy Domain name you have purchased.