How Can We Help?
Withdrawals
Overview
The module provides a detailed ledger of all withdrawals from the HOA’s bank accounts. It is designed to help with financial oversight, enabling the tracking of payments made, such as for services rendered to the HOA, including maintenance and operational expenses.
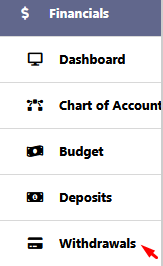
To navigate to the Withdrawals module in RunHOA, first access the ‘Financials‘ section on the main menu, then click on ‘Withdrawals‘ to manage and record all financial withdrawals for your HOA.
Withdrawals Grid
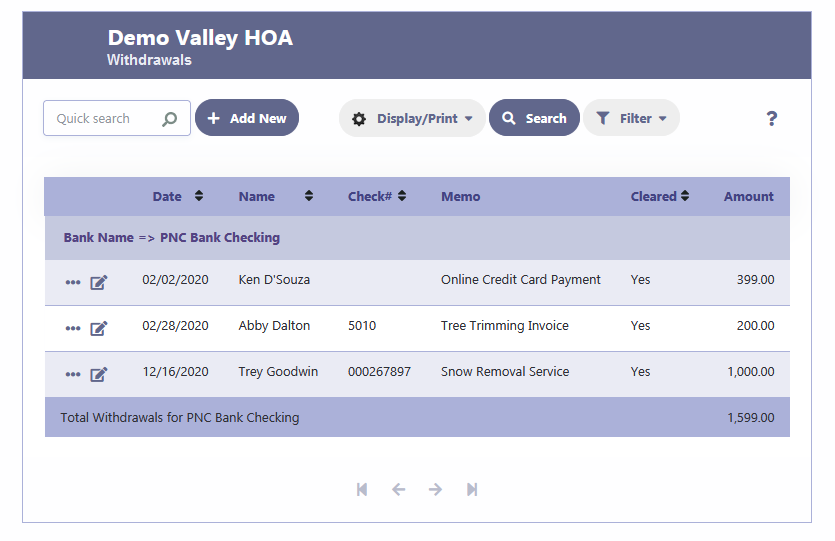
Once you have clicked on the ‘Withdrawals’ option within the Financials section, you will be presented with the Withdrawals Grid, which displays a comprehensive list of all withdrawal transactions. Here’s how to use the grid:
- Quick Search: Use this feature to quickly find specific transactions by entering relevant search terms, such as the payee’s name or a date.
- Add New: Click this button to enter a new withdrawal transaction.
- Display/Print: Select from this dropdown menu to display the list in a particular format or print the grid. You can export the data to PDF, Word, Excel formats, or get a printout directly.
- Search: Click here to perform a more advanced search with additional criteria.
- Filter: The “Filter” button allows you to refine the data displayed on the screen. By clicking on it, you can choose to sort the information based on specific columns, arrange the data in a particular order, or view a summary of the information. This feature helps to customize the view to your preference, making it easier to focus on particular details or get a broad overview as needed.
- Transaction List: The main area of the grid shows the list of withdrawals. Here, you can review the following columns:
- Date: The date on which each transaction was processed.
- Name: The name of the recipient of the funds.
- Check#: The check number used for the withdrawal, if applicable.
- Memo: Any notes or memos associated with the transaction.
- Cleared: Indicates whether the transaction has been cleared by the bank.
- Amount: The total amount withdrawn for each transaction.
- Pagination Controls: Located at the bottom of the grid, use these to navigate between pages of transactions if your list extends beyond one page.
- Edit/Delete: By clicking on the options next to each transaction, you can edit the details or delete a transaction if necessary.
Adding a Withdrawal Transaction
When adding a withdrawal transaction in the system, follow these steps to ensure all details are accurately captured:
- Bank Account: Select the bank account from the dropdown menu from which the withdrawal is being made.
- Date: Choose or input the date of the transaction. This field is formatted as MM/DD/YYYY.
- Check Number: Enter the number of the check associated with the withdrawal.
- Name: Type in the name of the payee – the person or organization to whom the check is written.
- Cleared?: Indicate whether the check has cleared the bank by selecting ‘Yes’ or ‘No’ from the dropdown menu. This is essential for accurate reconciliation of bank statements.
- Total Amount: Input the total dollar amount of the withdrawal.
- Memo: Provide any additional information about the withdrawal in the memo field. This could be a description of the purpose of the payment, invoice numbers, or any other relevant notes.
- Account Category: Choose the appropriate category for the withdrawal from the dropdown menu to classify the expense correctly.
- Category Details: Enter specific details related to the chosen category, which may include a description or reference to the service or product the withdrawal is covering.
- Amount: Specify the amount that pertains to the selected account category.
If the withdrawal needs to be allocated across multiple categories:
- Add Splits: Click the ‘Add Splits’ button if you need to divide the withdrawal across different categories. You will then repeat the steps for Account Category, Category Details, and Amount for each split.
After filling out all necessary fields:
- Save: Click the ‘Save’ button to record the new withdrawal transaction into the system.
- Delete: If you’ve made an error or need to remove a transaction, use the ‘Delete’ button.
- Display/Print Check: If you need a physical or digital copy of the check, use this option.
- Back: To return to the previous screen without saving any changes, click the ‘Back’ button.
